

Appoint a named visit leader and classify your visit’s risk level before you do anything else. That single step determines every other decision you make, from staffing ratios to the paperwork you actually need. The HSE is clear: prosecutions for school trip accidents are rare and almost always involve recklessness or a clear management failure, not a well-intentioned teacher who misjudged the weather. Proportionate precautions, not mountains of forms, are what keep pupils safe and keep you on the right side of the law.
Once you have your visit leader in place, work through these five actions before anything else:
- Appoint your EVC and confirm the visit leader’s competence for the activity type and age group.
- Classify the visit as routine or higher-risk using DfE guidance to decide the approval level needed.
- Confirm staffing numbers against the activity, environment, age group and any SEND needs in the group.
- Check your provider’s credentials: public liability insurance, instructor qualifications, DBS checks and LOtC Quality Badge or equivalent.
- Notify parents and establish your emergency contact chain, including a 24/7 on-call number at school.
The three national bodies to consult throughout are OEAP (practitioner guidance and training), HSE (legal framework and proportionality) and DfE (statutory guidance for schools in England).
Key takeaways
Proportionate planning, clear role accountability and a competent visit leader are the three factors that determine whether a school outdoor activity is safe and legally sound.
| Point | Details |
|---|---|
| Appoint roles first | Name your EVC and visit leader before any other planning step; competence is the single most important safety factor. |
| Classify, then plan | Distinguish routine from higher-risk visits; the classification determines the approval level and documentation required. |
| Check providers thoroughly | Confirm public liability insurance, DBS checks, instructor qualifications and LOtC Quality Badge before contracting. |
| Build Plan B before departure | Document weather triggers and alternative arrangements in the visit plan, not on the day under pressure. |
| Record and debrief | Complete the post-visit evaluation within 48 hours and log near-misses as well as incidents to improve future visits. |
| Laserclay for schools | Laserclay’s facilitator-led laser clay packages offer a low-risk, inclusive outdoor activity with provider assurance materials available on request. |
Table of Contents
- Your go/no-go planning checklist
- How to do a proportionate risk assessment for school outings
- Who must do what: EVC, visit leader and headteacher
- Setting supervision levels, staffing ratios and briefing routines
- How to check and assure external activity providers
- Reading forecasts and building a practical Plan B
- Emergency response, contacts and communications
- Managing medical needs, SEND and safeguarding off site
- Day-of practicalities: briefings, headcounts and kit
- 1. Nature treasure hunt
- 2. Orienteering and map reading
- 3. Outdoor science fieldwork
- 4. Loose-parts construction
- 5. Outdoor art and sketching
- 6. Team games and cooperative challenges
- 7. Laser clay shooting
- 8. Outdoor cooking and bushcraft
- 9. Environmental improvement projects
- 10. Photography and digital recording walks
- When an activity is higher risk: extra checks you must do
- What to record, who approves it and how to use EVOLVE
- How to evaluate the visit and record incidents
- Laser clay shooting: a safe, low-risk option for school groups
- The case for proportionate outdoor learning
- Laserclay’s school activity packages
- Sources
Your go/no-go planning checklist
Run through this before you commit to a date or sign a provider contract. It takes roughly ten minutes and will surface any showstoppers early.
Does this visit need a full risk assessment? If the activity involves water, heights, remote terrain, adventure activities or any element outside everyday school life, yes. Routine visits to familiar, low-hazard sites need proportionate planning notes rather than a formal multi-page document.
Record your checklist and planning notes on EVOLVE or your local authority’s equivalent system. EVOLVE lets you attach provider assurances, log medical information and produce an approval record without duplicating effort.
How to do a proportionate risk assessment for school outings
The HSE’s guidance on school trips makes the point plainly: unnecessary paperwork should not prevent learning opportunities. The goal is to identify real risks and put sensible controls in place, not to produce a document that impresses an inspector.
The five-step process
- Classify the visit. Routine visits (a local park walk, a museum trip) need brief planning notes; higher-risk visits require a formal risk assessment and approval.
- Identify the hazards. Consider transport, site, activity, group characteristics and weather.
- Judge likelihood and severity. Weigh risks proportionately.
- List control measures and assign monitoring tasks. Assign clear responsibilities.
- Set triggers for Plan B. Decide when to adapt or cancel the visit in advance.
Common hazards and practical controls
| Hazard | Likelihood | Severity | Control measure |
|---|---|---|---|
| Transport incident | Low | High | Licensed operator, seatbelts, pre-journey briefing |
| Missed headcount / lost child | Medium | High | Headcount at every transition point, buddy system |
| Adverse weather | Medium | Medium–High | Forecast checked 48 hours and morning of visit, Plan B documented |
| Water margin / drowning | Low | Very high | Exclusion zones, throw lines, qualified supervision |
| Allergic reaction | Low | Very high | Named medication carried, staff trained in use, medical info distributed |
| Road crossing | Medium | High | Designated crossing points, adult-led crossing, high-vis if needed |
| Uneven terrain / falls | Medium | Low–Medium | Appropriate footwear briefed, route pre-walked |
Record your assessment on EVOLVE or your school’s system. Attach it to the visit record so it is available to the EVC, the headteacher and, if needed, your local authority adviser.
Pro Tip: Ask the provider to show you their emergency evacuation routes and their on-site first-aid arrangements before you sign anything. A provider who cannot answer those questions in under two minutes has not thought them through.
Who must do what: EVC, visit leader and headteacher
Clarity about roles prevents the most common planning failures. The DfE guidance sets out a clear hierarchy, and the OEAP National Guidance provides role-specific reading lists for each position.
Educational Visits Co-ordinator (EVC)
The EVC is the school’s internal expert on visit planning. Their responsibilities include:
- Checking that visit leaders are competent for the specific activity and group.
- Reviewing and approving visit plans before they go to the headteacher.
- Maintaining records of staff training, qualifications and DBS status.
- Liaising with the local authority outdoor education adviser when needed.
- Keeping up to date with OEAP National Guidance and DfE updates.
EVCs should complete recognised EVC training, typically offered through local authorities or OEAP-accredited providers.
Visit leader
The visit leader holds operational responsibility on the day. They must:
- Have relevant experience and, for higher-risk activities, appropriate qualifications.
- Prepare the risk assessment and emergency plan.
- Brief all accompanying adults on their roles and emergency procedures.
- Carry emergency contact information and medical details for every pupil.
- Make all on-the-day safety decisions, including whether to invoke Plan B.
Headteacher and governing body
The headteacher approves all visits and must personally approve higher-risk activities. Governors set the school’s policy framework. Neither role involves day-to-day operational decisions, but both carry accountability for the systems that support safe visits.
When to escalate: If a visit involves a new provider, an unfamiliar environment, adventurous activities or a group with complex SEND needs, the EVC should consult the local authority outdoor education adviser or an OEAP-accredited adviser before finalising plans.
Setting supervision levels, staffing ratios and briefing routines
No single ratio fits every visit. The right number of adults depends on the age of the group, the presence of SEND pupils, the activity type, the environment and the transport arrangements.
Factors to consider when setting ratios
- Age: Younger pupils need closer supervision. A Year 2 group on a farm visit needs more adults per child than a Year 10 group on a geography fieldwork trip.
- SEND: Pupils with mobility needs, communication difficulties or behavioural support plans may need one-to-one or small-group supervision.
- Activity: A passive museum visit differs from an active orienteering session. Higher-energy or higher-risk activities need more adults.
- Environment: Open water, roads, urban crowds and remote terrain all increase supervision demands.
- Transport: Every adult on a coach is unavailable for supervision during the journey; factor this into your total.
Headcount and briefing cadence
- On arrival at the site, before any activity begins.
- Before and after every transition (moving between zones, boarding transport, entering a building).
- At regular intervals during free or semi-structured activity.
- Before departure and on arrival back at school.
Adjusting staffing on the day
If a staff member is ill on the morning of the visit, the visit leader must decide whether the remaining adults can maintain safe supervision. If not, the visit should be postponed. Weather deterioration, unexpected behaviour issues or a change in group composition (a pupil arriving with an undisclosed medical condition) are all triggers to reassess ratios before proceeding.
How to check and assure external activity providers
A provider’s website rarely tells you what you need to know. Ask directly, in writing, before you commit.
What to ask every provider
- Public liability insurance: minimum £5 million, valid for the activity type. Ask for the certificate, not just a verbal confirmation.
- Instructor qualifications: relevant National Governing Body (NGB) awards for the specific activity (e.g., British Canoeing, Mountain Training, Archery GB).
- DBS checks: enhanced DBS for all staff who will have unsupervised contact with pupils.
- LOtC Quality Badge: the Learning Outside the Classroom Quality Badge is the clearest single indicator that a provider has been independently assessed for safety and learning quality. It does not replace your own checks, but it substantially reduces the burden of verification.
- Licensing: for regulated adventure activities (caving, climbing, watersports, trekking with under-18s), providers must hold an Adventure Activities Licensing Authority (AALA) licence or equivalent.
- Safeguarding policy: ask to see it. A provider who cannot produce one is not ready to work with school groups.
Red flags
- No written insurance certificate, or a certificate that does not cover the specific activity.
- Vague or verbal-only emergency plans (“we’ll deal with it if it happens”).
- Subcontracting to other providers without disclosing this upfront.
- Instructors whose qualifications do not match the activity being delivered.
- Resistance to sharing DBS or safeguarding documentation.
For visits involving water, a water safety risk assessment should be completed separately and the provider’s lifeguard provision confirmed before any aquatic activity is approved.
Reading forecasts and building a practical Plan B
Weather is the most common reason a well-planned visit goes wrong on the day. The OEAP’s weather guidance sets out the key actions for assessing forecast-related risks and deciding when to cancel or adapt.
Weather risk checklist
- Check the Met Office forecast at 48 hours and again on the morning of the visit.
- Note temperature range, wind speed and direction, precipitation probability and any severe weather warnings.
- For coastal or riverside visits, check tide tables and flood alerts via the Environment Agency.
- For upland or exposed sites, check mountain weather forecasts (MWIS for Scotland and northern England).
- For summer visits, assess heat and UV risk, particularly for younger pupils.
- For winter visits, assess cold injury risk, especially if the group will be inactive for periods.
When to cancel vs. adapt
Cancel if: a Met Office severe weather warning is in place for the area, the activity cannot be safely modified to account for conditions, or the group includes pupils whose medical conditions make the forecast conditions a significant risk.
Adapt if: conditions are worse than ideal but manageable with changes to timing, route, clothing or activity format.
Plan B options
- Move to a sheltered or indoor version of the activity (a classroom-based element of a fieldwork session, for example).
- Shift the timing of outdoor elements to avoid the worst of the forecast.
- Swap to a lower-exposure route or site.
- Reduce the duration of outdoor exposure and increase rest periods.
Document your Plan B in the visit plan before departure. A Plan B that is invented on the day under pressure is rarely as good as one that was thought through calmly the evening before.
Emergency response, contacts and communications
Every visit leader should be able to answer three questions before leaving school: who do I call first, what do I say, and where do I take the group?
Emergency response flow
- Secure the group. Move pupils to a safe location and account for everyone.
- Call emergency services if there is a risk to life (999 in the UK).
- Administer first aid within your competence while waiting for services.
- Inform the school. Call the headteacher or designated on-call contact immediately.
- Do not speak to media. Refer all press enquiries to the headteacher.
- Record everything. Time of incident, actions taken, who was informed and when.
For visits to busy urban sites or large public events, ProtectUK guidance advises including the possibility of a terrorist incident in your emergency plan. Identify safe shelter points, agree a communication plan and brief accompanying adults before departure.
Emergency contact card (fields to include)
- Visit leader’s name and mobile number.
- Deputy leader’s name and mobile number.
- School’s 24/7 emergency contact number.
- Headteacher’s direct number.
- Local emergency services (pre-saved: 999, nearest A&E address).
- Insurance provider’s emergency line and policy number.
- Meeting point at the site (primary and secondary).
- Medical summary for each pupil (carried separately in a sealed envelope).
Communications checks before departure
- All leaders have charged phones and a portable power bank.
- Every adult has the full leader contact list, not just the visit leader’s number.
- A check-in schedule is agreed (e.g., text to school on arrival, at midday and on departure).
- The school knows the expected return time and what to do if it is missed.
Managing medical needs, SEND and safeguarding off site
Medical checklist
- Collect medical information on the consent form and flag it to all accompanying adults, not just the visit leader.
- Confirm which pupils carry their own medication (inhalers, EpiPens) and which require adult administration.
- Ensure at least one adult is trained in the use of any medication likely to be needed.
- Carry a copy of each pupil’s allergy or medical action plan.
- Know the location of the nearest A&E and the route to it from the site.
- Record any illness or injury during the visit, however minor.
Reasonable adjustments for SEND pupils
Every pupil has the right to participate. Before the visit, review each SEND pupil’s support plan and consider:
- Whether the route, terrain or activity format needs adapting.
- Whether additional adult support is needed for specific pupils.
- Whether the pupil’s communication needs affect how briefings are delivered.
- Whether any equipment (mobility aids, sensory supports) needs to be transported.
Document adjustments in the visit plan and share them with all accompanying adults. For inclusive outdoor school sports, the principle is the same: adapt the activity to the pupil, not the other way around.
Safeguarding brief checklist
- All accompanying adults (including volunteers and parent helpers) have a valid enhanced DBS check.
- No adult should be alone with a single pupil at any point.
- One-to-one support arrangements are documented and known to all adults.
- Data-sharing consents cover the sharing of medical and SEND information with the provider.
- Adults know the school’s designated safeguarding lead and how to contact them if a concern arises during the visit.
Day-of practicalities: briefings, headcounts and kit
Morning checklist for the visit leader
- Attendance list confirmed against consent forms received.
- Medical information and medication collected and distributed to relevant adults.
- Kit checked: first-aid kit, emergency contact cards, mobile phones charged, high-vis if needed.
- Weather checked and Plan B confirmed or activated if needed.
- Transport confirmed: driver contact, departure time, return time.
Pupil briefing (keep it short and specific)
- Where we are going and what we will do.
- Rules for the day: stay with your group, follow adult instructions immediately, report anything that worries you.
- What to do if you get separated: stay where you are, find a member of staff or a uniformed official, do not leave the site.
- Emergency meeting point.
Adult briefing
- Individual roles and zones of responsibility.
- Headcount protocol: who counts, when and what to do if the number is wrong.
- Emergency procedure: who calls 999, who stays with the group, who contacts school.
- Medical information: who carries what, who is trained in what.
Missing child protocol
If a headcount is wrong, stop all activity immediately. Recount. If still wrong: one adult searches the immediate area while others keep the group together; call the school and, if not found within five minutes, call 999. Do not wait.
1. Nature treasure hunt
Learning outcome: Observation, classification, local ecology. Top hazard: Pupils straying from the group. Core control: Defined search zone, buddy pairs, adult at zone boundary.
OPAL’s practical outdoor activity ideas include nature treasure hunts as a low-risk, high-engagement option for primary and lower secondary groups. The activity scales easily: younger pupils identify common species from picture cards; older pupils record findings on a species tally sheet linked to curriculum objectives.
2. Orienteering and map reading
Learning outcome: Geography, spatial reasoning, teamwork. Top hazard: Groups leaving the designated area. Core control: Clearly marked boundaries, adult checkpoints, whistle signals.
Works well from Year 5 upwards. For lower secondary, introduce six-figure grid references and link to OS map skills. Limit group sizes to four or five pupils per team so every child is actively navigating.
3. Outdoor science fieldwork
Learning outcome: Data collection, hypothesis testing, environmental science. Top hazard: Contact with water, soil or plant material. Core control: Gloves provided, handwashing station at end, no eating during activity.
Pond dipping, soil sampling and weather station readings all deliver measurable curriculum outcomes. The key is to brief pupils on what not to touch before they start, not after.
4. Loose-parts construction
Learning outcome: Design, engineering principles, creative problem-solving. Top hazard: Splinters, sharp edges, unstable structures. Core control: Adult supervision of building phase, no structures taller than pupil height, gloves available.
This works across a wide age range. Primary pupils build dens and bridges; secondary pupils can be given a design brief (build a structure that holds a specific weight) to add rigour.
5. Outdoor art and sketching
Learning outcome: Observation, art skills, environmental awareness. Top hazard: Pupils wandering to find subjects. Core control: Defined sketching zone, register before and after.
Low-risk and highly adaptable. Works in any season and requires minimal equipment. Link to geography or science by asking pupils to sketch and annotate features of the local environment.
6. Team games and cooperative challenges
Learning outcome: Communication, leadership, physical literacy. Top hazard: Collisions, overexertion in heat. Core control: Warm-up, clear rules, water available, shaded rest area.
Classic team games (capture the flag, relay races, problem-solving challenges) work for all secondary year groups. For primary, keep rules simple and rotate roles so every pupil leads at some point.
For alternative sports day formats, cooperative challenges often produce more engagement than competitive events.
7. Laser clay shooting
Learning outcome: Hand-eye coordination, focus, sporting confidence. Top hazard: Minimal (no projectiles, no live ammunition). Core control: Facilitator-led, safety briefing before play, defined shooting zone.

Laser clay shooting uses sound-simulated deactivated shotguns and reusable laser targets, removing the risks associated with traditional clay shooting entirely. It is accessible to pupils of all abilities and requires no prior experience. Facilitators manage the session, so the teacher’s supervisory role is straightforward. More on this in the provider section below.
8. Outdoor cooking and bushcraft
Learning outcome: Food science, survival skills, teamwork. Top hazard: Burns, cuts, fire management. Core control: Adult-managed fire, designated cutting area, first-aid kit immediately accessible.
Higher-risk than most outdoor activities, but manageable with proper controls. Requires a qualified bushcraft leader or instructor with relevant experience. Not suitable for ad hoc delivery by classroom teachers without specific training.
9. Environmental improvement projects
Learning outcome: Citizenship, ecology, physical education. Top hazard: Tools (spades, rakes), uneven ground. Core control: Tool handling briefing, adult supervision of digging, appropriate footwear.
Planting trees, building bug hotels or clearing a school pond are all curriculum-linked and produce a lasting result. These work particularly well as end-of-term or whole-school projects.
10. Photography and digital recording walks
Learning outcome: Media literacy, geography, communication. Top hazard: Pupils using devices near roads or water. Core control: Devices put away at road crossings, no photography near water margins without adult supervision.
Works well for upper primary and secondary. Pupils document a local environment, then use their images in a classroom presentation or display. The activity requires minimal equipment and almost no physical risk.
Quick-reference activity table
| Activity | Learning outcome | Top hazard | Core control |
|---|---|---|---|
| Nature treasure hunt | Ecology, observation | Straying from group | Defined zone, buddy pairs |
| Orienteering | Geography, teamwork | Leaving boundary | Adult checkpoints, whistle signals |
| Science fieldwork | Data collection | Water/soil contact | Gloves, handwashing station |
| Loose-parts construction | Design, engineering | Splinters, instability | Adult supervision, height limit |
| Outdoor art | Observation, art | Wandering | Defined sketching zone |
| Team games | Physical literacy | Collisions, heat | Warm-up, water, shade |
| Laser clay shooting | Coordination, focus | Minimal | Facilitator-led, defined zone |
| Outdoor cooking | Food science, survival | Burns, cuts | Adult-managed fire, first aid |
| Environmental projects | Citizenship, ecology | Tools, terrain | Tool briefing, footwear |
| Photography walk | Media literacy | Devices near hazards | Devices away at crossings |
When an activity is higher risk: extra checks you must do
Some activities carry risks that go beyond what a competent teacher can manage without specialist support. Identifying these early prevents the most serious incidents.
Commonly regulated or higher-risk activities
- Watersports (kayaking, canoeing, open-water swimming, sailing).
- Climbing and abseiling.
- Archery.
- Mountain biking on technical terrain.
- Hillwalking or trekking in remote or upland areas.
- Caving and gorge walking.
- Any activity involving fire.
For the first three categories and several others, providers working with under-18s in England and Wales must hold an AALA licence. Check the HSE’s AALA register before booking.
Extra evidence to request from providers
- AALA licence number and expiry date (verify on the HSE register).
- LOtC Quality Badge certificate.
- Instructor NGB qualifications relevant to the specific activity.
- Lifeguard provision and rescue equipment details for any water activity.
- Written emergency and rescue plan for the site.
- Evidence of regular equipment inspection and maintenance.
A critical rule
Never add a higher-risk activity to a visit on the day. If a provider suggests an unplanned element (“the weather’s great, shall we try the river crossing?”), the answer is no. Higher-risk additions require their own risk assessment, approval from the headteacher or governing body, and parental consent. None of those can be obtained in the field.
What to record, who approves it and how to use EVOLVE
Documentation should support safety, not substitute for it. The approval flow depends on the visit category.
Approval flow by visit category
- Routine visits (local, low-hazard, familiar): EVC review and visit leader sign-off. Headteacher awareness recommended.
- Non-routine visits (unfamiliar site, overnight, moderate risk): EVC review and headteacher approval.
- Higher-risk or adventurous visits: EVC review, headteacher approval, governing body notification. Local authority adviser consultation recommended.
Minimal documentation to keep
- Visit plan (date, site, activity, group, staffing, transport).
- Risk assessment (proportionate to visit type).
- Provider assurances (insurance, DBS, qualifications, LOtC badge).
- Medical information and medication plans.
- Emergency contact card.
- Parental consent forms.
- Incident log (even if blank, confirming no incidents occurred).
- Post-visit evaluation notes.
EVOLVE practical tips
EVOLVE is the most widely used visit planning and recording system in English schools and local authorities. To get the most from it:
- Use the event-specific notes field to record provider assurance details, not just the provider name.
- Attach scanned copies of insurance certificates and LOtC badges directly to the visit record.
- Complete the post-visit evaluation field within 48 hours while details are fresh.
- Record near-misses as well as incidents; they are the most useful data for improving future visits.
How to evaluate the visit and record incidents
A post-visit debrief takes 20 minutes and is the single most effective way to improve the next one.
Incident record fields to keep
- Date, time and location of incident.
- Names of pupils and adults involved.
- Description of what happened (factual, not interpretive).
- First-aid treatment given and by whom.
- Whether parents were informed and when.
- Whether the incident was an accident, a near-miss or a safeguarding concern.
- Follow-up actions required.
The distinction between an accident (unplanned event causing injury), a near-miss (unplanned event that could have caused injury) and a safeguarding concern (behaviour or disclosure requiring referral) matters for how you record and escalate each one.
Debrief questions for staff
- What worked well and why?
- What would you change for next time?
- Were there any near-misses or unexpected hazards?
- Did the risk assessment reflect what actually happened on the day?
- Are there any follow-up actions for the EVC or headteacher?
Debrief questions for pupils
- What did you enjoy most?
- Was there anything that felt unsafe or uncomfortable?
- What would you want to do differently?
Escalation threshold
Serious incidents (those involving hospitalisation, a fatality, or a dangerous occurrence) must be reported to the HSE under RIDDOR (Reporting of Injuries, Diseases and Dangerous Occurrences Regulations). The EVC and headteacher should be informed immediately, and the school’s insurer notified within 24 hours.
Laser clay shooting: a safe, low-risk option for school groups
Laser clay shooting is worth considering when you want an outdoor activity that is genuinely inclusive, requires minimal PPE and carries a very low inherent risk profile.
The format uses sound-simulated deactivated shotguns and reusable laser targets. There are no projectiles, no live ammunition and no lead. Targets are electronic and reusable, which also removes the environmental concerns associated with traditional clay shooting. You can read more about what laser clay shooting involves before committing to a booking.
Safety advantages for schools
- No live ammunition or projectiles: the primary physical risk of traditional shooting is absent.
- Minimal PPE required: ear defenders are typically not needed at the sound levels used.
- Facilitator-led: trained facilitators manage the session, brief participants and supervise the shooting zone, reducing the supervisory burden on teachers.
- Accessible: the format works for pupils of all abilities and requires no prior experience or physical fitness threshold.
- Eco-friendly: reusable targets and no lead contamination mean no environmental remediation concerns.
What the school provides
- Adequate outdoor (or indoor) space for the shooting zone.
- Accompanying supervisory staff in line with your school’s ratios.
- Parental consent forms covering the activity.
- Medical information for all participating pupils.
Laserclay provides facilitators, all equipment, setup and event customisation. Insurance details and facilitator DBS documentation are available on request, which means your provider assurance checklist for this activity is straightforward to complete. For schools considering sourcing equipment for a shooting sport programme, the laser format removes most of the regulatory complexity associated with traditional shooting.
The case for proportionate outdoor learning
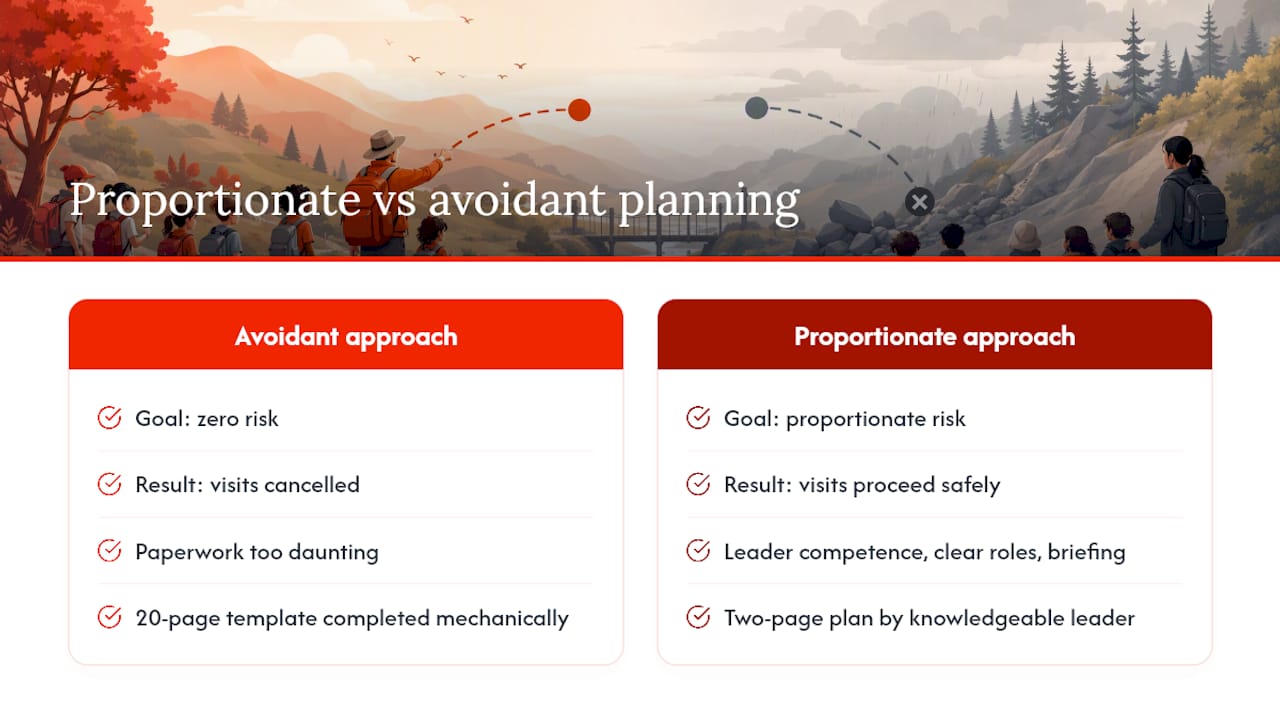
There is a persistent myth in schools that the safest visit is the one that never happens. Every year, pupils miss genuinely formative experiences because a well-meaning teacher decided the paperwork was too daunting or the risk too hard to quantify. That is not caution. It is a failure of educational leadership dressed up as prudence.
The OEAP, HSE and DfE all say the same thing: the goal is not zero risk, it is proportionate risk management. A competent visit leader with a clear plan, a sensible risk assessment and a well-briefed team is doing everything the law and good practice require. Scotland’s Going Out There guidance puts it well: use your local outdoor environment, plan proportionately and get on with it.
What actually predicts a safe visit is not the length of the risk assessment document. It is the competence of the leader, the clarity of the roles and the quality of the briefing. A two-page plan written by someone who knows the site and the group will always outperform a 20-page template completed mechanically by someone who has never visited the location.
Outdoor learning builds things that classrooms cannot: spatial awareness, physical confidence, the ability to read an environment and respond to it. Pupils who spend time outdoors in structured, well-led activities develop skills that show up in academic performance, social behaviour and long-term wellbeing. The evidence base for this is strong, and the regulatory framework supports it. The only thing standing between most schools and more outdoor learning is the willingness to plan it properly and go.
Laserclay’s school activity packages
Schools that want a low-risk, facilitator-managed outdoor activity without the provider-vetting complexity will find Laserclay’s packages straightforward to book and easy to document.
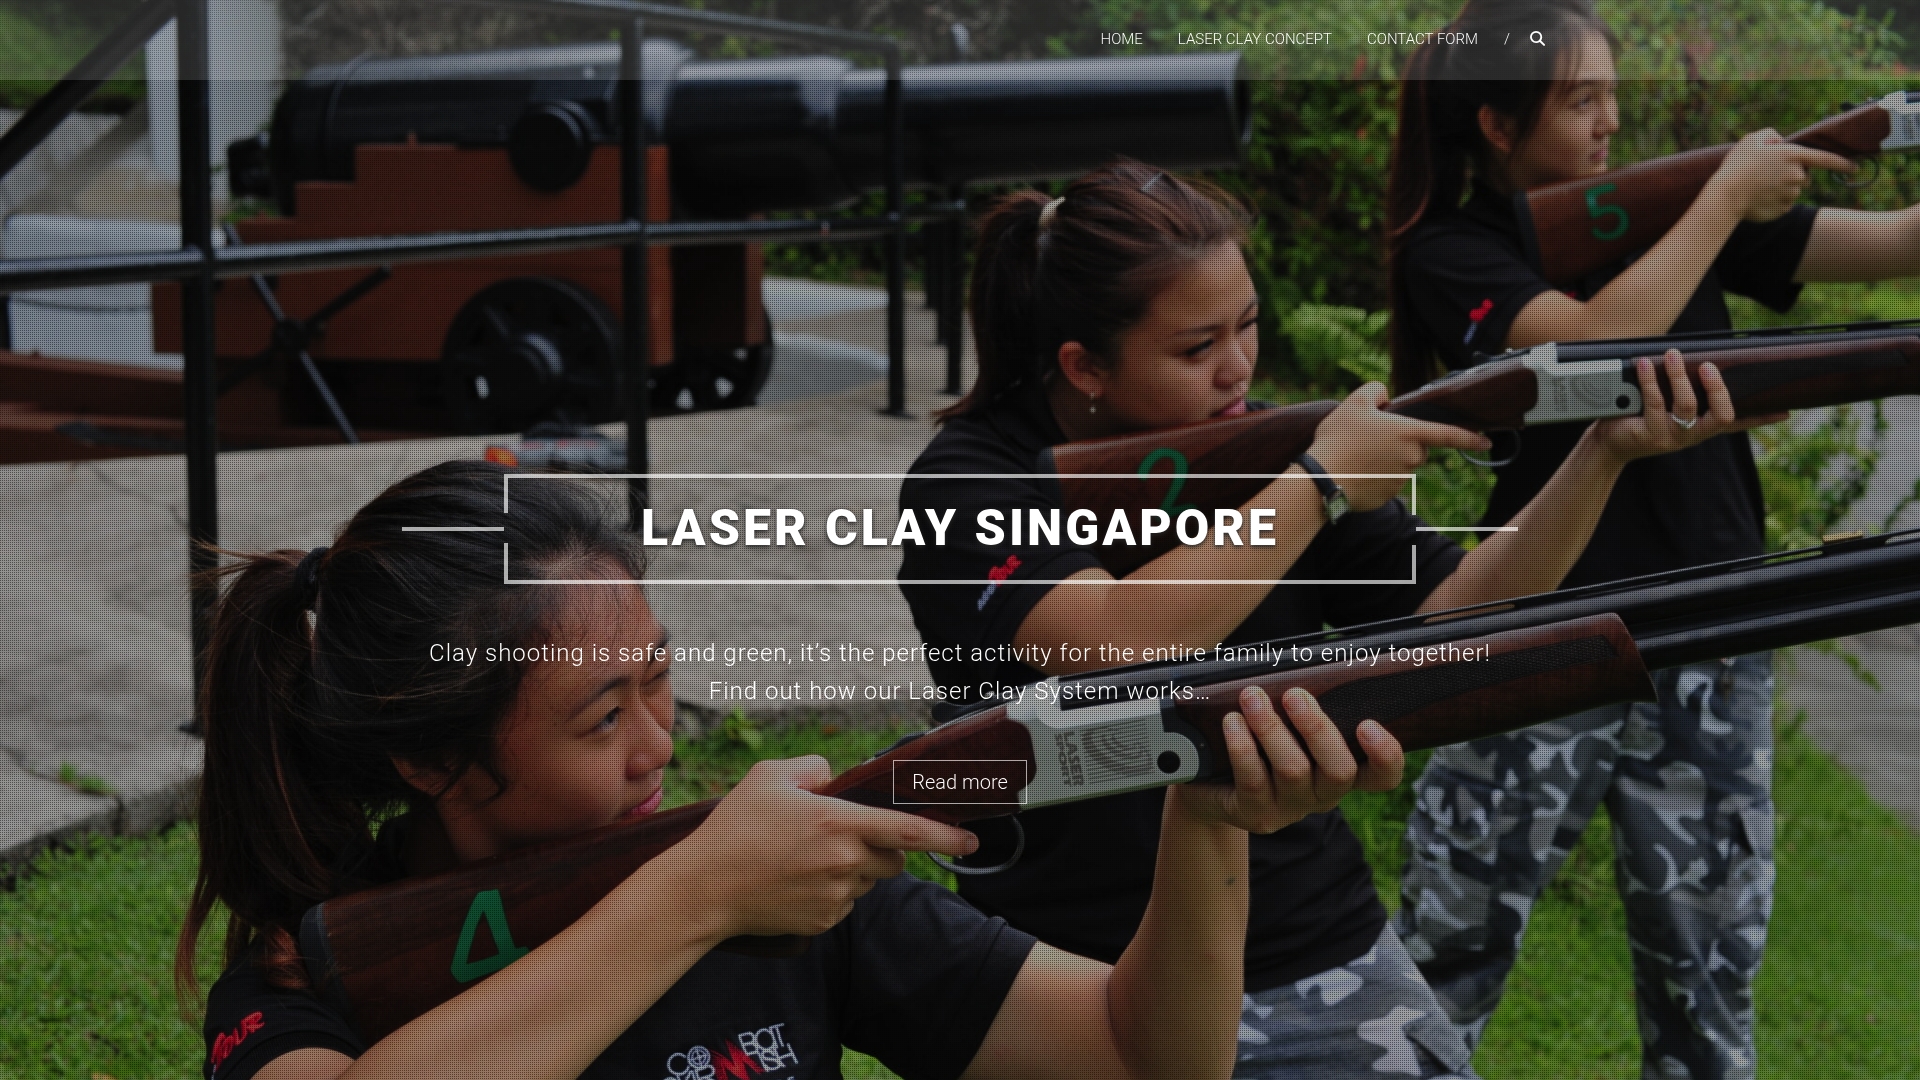
Laserclay provides complete laser clay shooting packages for school camps, sports days and outdoor learning events. Every package includes trained facilitators, all equipment, venue setup and real-time electronic scoreboards. The format is inclusive by design: no prior experience needed, no physical fitness threshold and no live ammunition. For schools that need provider assurance materials, facilitator DBS documentation and insurance details are available on request, so your go/no-go checklist is quick to complete.
The benefits for school group events include a genuinely level playing field: pupils who struggle in traditional sports often excel here, which makes it a strong choice for mixed-ability groups and inclusive events. To request a school pack with sample risk-assessment controls and session formats, visit Laserclay’s event rentals page or get in touch directly to discuss dates and group sizes.
Sources
These are the primary sources to consult when planning safe outdoor activities for school groups in the UK. Each serves a distinct purpose.
- School trips – HSE
- Gov
- The Outdoor Education Advisers’ Panel (OEAP) – About NG
- Outdoor Learning and Educational visits in England and Wales | ProtectUK
- 10 fun activities for outdoor learning | OPAL
- Going Out There: health and safety guidance on leaving the school grounds – Education Scotland
Recommended
- Inclusive outdoor school sports: 10 examples for educators | Laser Clay Singapore
- School sports day alternative activity ideas: 2026 guide | Laser Clay Singapore
- Child-safe shooting activity: a parent’s guide 2026 | Laser Clay Singapore
- How to source equipment for a school shooting sport programme | Laser Clay Singapore